Japan Life · Misawa Guides

Japan Post Domestic Shipping for Home Based Businesses

Recently I released my blog post on International Shipping Through Japan Post in hopes of making it easier for home based businesses to know how to ship back to the states without using our APO system, which is not allowed. Today I want to help explain the process of shipping anywhere IN Japan, in hopes that military home based businesses throughout Japan will be able to start shipping to the various bases and areas in the country.

Side note, if you are a military member, dependent, or contractor stationed in Japan currently, please join our business network on Facebook here!

____

There are several awesome and affordable options for shipping your goods anywhere within the county (Mainland and Okinawa.) And the best part? With Japan being such a small country geographically speaking, the shipping is usually FAST, FAST, FAST.

Some options will allow you to do all of the shipping 100% from your home until the moment you drop it into a collection box, and others will still require a trip to the Japan Post office.

Before I dive into the different methods, I should also mention that while our base offers Japan Post shipping directly to your door, some bases will still take the Japan Post mail to your BASE post office. If you have tracking on your package, you should be able to see which place it is delivered to. At Misawa, Japan Post delivers direct to your HOME.

Again, thank you SO much to my sweet friend Saaya for helping me understand all of this!

____
First, here is a list of things you will need for shipping domestic within Japan, especially if you want to do your label printing or even just price estimating at home.

  1. A postage scale that weighs in GRAMS/KG.
    This is the one that I have been using since 2017 for any sort of package mailing even in the states, and it has always been accurate for me. I will be purchasing this slightly bigger option (for wider packages) this week though.
  2. Regular packaging/mailing supplies for securely sending your products. (Some shipping methods require using Japan Post materials, others will require you to use your own.)
  3. A printer or access to somewhere that you are able to print your customs forms or labels.
  4. Click Post will require an Amazon Japan or Yahoo Japan account that can link to your account as a payment method if you choose to send items this way.
  5. Measuring tool from Daiso or Seria for measuring package thickness (Japan Post is EXTREMELY strict on package sizes, so I highly recommend buying one of these.)

And that’s basically it! Now let’s dive into the ways you can send mail domestically.

Lastly before I go into shipping methods, I want to send a quick reminder to make sure you are charging sales tax/VAT taxes as they are required.

I personally am using the ETSY platform for my selling and shipping online. Etsy collects the correct necessary taxes based on the buyer’s location (including overseas VAT taxes) and remits them to the correct jurisdictions on your behalf. I visited the legal office at Misawa to ensure that my using of the off base post office would be legal if I were to open an Etsy shop for my hair bows and other creations, and that SOFA would not be violated somehow. I was given the go-ahead by legal. I believe that Shopify functions similarly, and other platforms may as well. Be aware that when selling to an international address, often VAT taxes need to be charged and sent to the correct jurisdictions. Because of this, I would recommend against selling independently, and would lean towards using a platform like Etsy.

If you’d like to open an Etsy for the first time, clicking on my referral link here will give you your first 40 listings for free!

ALL OF THIS TO SAY, I CANNOT GIVE YOU LEGAL OR TAX ADVICE AND THIS BLOG POST IS NOT MEANT TO BE SUCH. If you are concerned about your own business and the legalities behind it, PLEASE visit your legal office or consult a tax professional.

____

Click Post:
Includes tracking | One Flat Rate | Inexpensive

Click Post is arguably the best option for domestic shipping, especially for smaller and lighter items. At the very least, it is the most convenient. Click Post will allow you to ship anywhere within Japan for 198 yen, and will include tracking for your package at the same rate! Even better yet, Click Post allows you to pack your own items, print your own label, and drop your package off at any collection box. (If you are located in Misawa, there is a collection box outside of our own APO post office, which is collected from daily.) I.e. if you don’t want to visit a post office, you don’t have to!

For this shipping type, your packages will fall under these restrictions:

Length should be no less than 14cm, and no more than 34cm.
Width should be no less than 9cm, and no more than 25cm.
The thickness of your package cannot surpass 3cm.
The weight should be under 1kg.

If you send a package bigger than any of these measurements, it will be returned to the sender, so be sure to use your measuring tool from Daiso, as mentioned earlier.

Much like ClickNShip in the states, you will create an account here in order to begin making labels on your online account for printing out at home.
When signing up for a new account, the personal information entry page will ask for your name (frigana), meaning your Japanese pronunciation of your name. You can use this link to enter your name and get the Japanese kanji for that box. The rest of the boxes are fairly self explanatory, just enter your Japanese address vs your American address. Your on-base Japanese address (for Misawa Air Base residents) will read as follows:

Name
House #, Street name
Misawa Air Base
Misawa-Shi Aomori-Ken
033-0012

Of course other bases will have similar addresses, just swap out your zip code, prefecture, city, chome (base), and actual house # and street name. Sometimes it takes a small amount of trial and error to make sure you get every part of your address in the form.

Everything on the ClickPost site will be in Japanese-even Chrome does not translate all of it. Unfortunately there is no way to turn this part into English without completely leaving the ClickPost part of the site. Do all of your registration on Chrome, and choose to automatically translate, and most will translate for you. For those parts that don’t, I used my Google translating app on my phone and simply pointed it at the screen, and it is fairly easily navigated that way.

After entering your own shipping address, you will hook up your Amazon account or Yahoo account to your Click Post account in order for Amazon/Yahoo Pay to function as your payment method! I feel that Amazon Japan is the easiest option to hook up. If you need an Amazon Japan account, it is super easy to make one. Click this link here to begin the process- you should also get a free trial of Amazon Japan Prime if you would like it. (Prime is an awesome way to order your HBB supplies within Japan and have them delivered straight to your door.) Once you link your account, you will begin signing in via either your Amazon or Yahoo account.

Create your account, confirm your email address, and then you may begin creating your labels for shipping!

When printing labels, if your printer messes up and does not print correctly, you will have only 30 minutes to print the label correctly. After this amount of time, the reprint option will no longer be available, and you will have to cancel the label and start over. Labels can be printed in either black and white or color. Also good news-if your label messes up, no worries, Japan Post does not charge your account until the package is actually scanned in at the Post Office!

Once you have printed your label and stuck it to your package, you may drop your package off at any collection box!

The website states that most packages will arrive the next day, sometimes the day after that. The only time it should take longer than 2 days would be if you are shipping to the islands instead of mainland. In which case it will add only a day or two more to the delivery time.

While there aren’t many downsides to ClickPost, unfortunately you are not able to add any “extras” to this shipping method, including express shipping or insurance. If you absolutely need insurance, I would recommend shipping your item via Yu Pack/Yu Mail.

Letter Pack:
Includes tracking | Two Flat Rates | Relatively Inexpensive

Letter packs are decent sized envelopes that are postage prepaid upon purchase, and ready to ship the moment you purchase them and fill them out. Letter packs may be purchased directly at the post office, or at some convenience stores. They come in two types: letter pack plus, and letter pack light. Letter packs unfortunately do not include insurance.

You will be allowed to fill the pack with as much as you would like, as long as you are able to seal the envelope, the thickness is under 3cm without needing to be squished, and the weight is under 4kg. Tracking is included with the letter pack- before you send the package, you will simply have to peel off your part of the tracking number. Letter packs can also be totally packed and shipped without stepping foot in a Post Office. Just seal it, and drop it in a collection box. The same price applies to these envelopes, no matter where you are shipping from or to. Essentially, it functions like a flat rate envelope does in the states- but instead of paying when you send the package, you are paying for your postage when you purchase the envelope itself.

The difference between a letter pack light and a letter pack plus is only a few key points. 370 yen is the price for letter pack lights, which are delivered to mailboxes and may be left. 520yen is the price for the letter pack plus, which will be delivered in-person to the recipient. If the recipient misses attempted delivery, they will have to pick up the item from their local post office. Letter pack plus will also allow you to go over the 3cm limit, as long as the envelope is able to be sealed.

You can buy these envelopes at the post office and most convenience stores. Letter packs are also available at the “stamp shop” which is JP’s online site for purchasing different shipping materials. if purchasing online, you must purchase the packs in sets of 20 though, so unless you are doing some serious shipping, purchasing in person is likely your best bet.

(If you are located in Misawa and have had a newborn on base, the “letter pack” is the way you send all of your documents to the Embassy, and it is the way they send your passport back to you! This is why they have you purchase two envelopes- you are sending them a prepaid letter pack inside of the letter pack you send them in order for them to be able to ship your documents back to you.)

Yu Pack Parcel:
Includes Tracking | Insured

Yu Pack is another great option for domestic shipping, though it is somewhat trickier to do than Click Post. While a little pricier, the dimensions of acceptable packages are also larger than the Click Post option, it will allow for heavier packages, and will also include insurance. Expect to spend at bare minimum around 800 yen within your own prefecture, usually around 1200-1500 yen for shipping to other prefectures. Prices will vary based on shipping destination and package size.
There are 7 sizes for Yu Pack, all determined by the total added cm of the package. See the diagram below for how the package size is added in order to decide which category your package falls into. If a package is heavier than 25kg, you may choose to send it via “weighted Yu Pack.”

Yu Pack parcels must be sent from a certified Yu Pack counter, which can be found at the post office, or at some convenience stores. Your first few times sending this way, I would HIGHLY recommend using the Post Office vs the scanning system at the convenience store.

Yu Pack also does has its own app that you may download for shipping discounts. Unlike the ClickPost process though, you will ONLY be printing a label, not paying for postage. This means that your package still must be taken to a certified Yu Pack location after printing your label. It cannot be dropped into a collection receptacle.

(Also, the app is fully in Japanese, so you will have to have a way to translate it the whole time you are using it. Once you accept the terms and click “new registration” there is a button at the top to switch to English, though not everything in the app will translate. It’s probably a personal preference on whether or not the hassle is worth it for the discounts.)
Once you have registered and entered all of your information including your Japanese address, you will have to confirm your account via your email for your registration to be final.
Several discounts are available for the Yu Pack service. A few include: using the app to register your packages (-180yen) or taking the package directly to the post office instead of another counter (-100 yen.) If shipping multiple items, thresholds also exist for discounts on multiple packages sent at once.

Yu Pack parcel offers a long list of specialized shipping services, including services for airport luggage, golf equipment, snowboarding/skiing, and baggage delivery. (We also commonly use Black Cat for larger packages or luggage like these, but that’s another story for another post.)

Refrigerated Yu Packs are also available for a very small added fee on top of the regular shipping fee.

You may visit this page to get a charge estimate on the type and size of Yu Pack you are looking into sending.

Yu Mail:
Inexpensive | Add-ons Available

While this method is the one that I probably understand the least, to my understanding, Yu Mail is the basic (very small package) shipping option you will get if you simply bring your package into the post office to hand write your label. Using this method you will be allowed to ship items up to 1kg.

Sizing for packages will be as follows: A = 34 cm, within B = 3 cm, within C = 25 cm

Fares will be the same nationwide, just based on weight. Remember to always weigh your packages once fully packed. Leave your package unsealed upon bringing it to the post office, or bring in a sample of what you are sending with you.

Basic Yu Mail will also allow for express sending, registered mail, and proof of delivery. For these added services, you can calculate your cost here.

____

And that is pretty much it! Personally, I will likely never use a method other than ClickPost, because it is just SO dang easy, but Japan Post really does offer a long list of affordable options for their domestic shipping.

Please of course feel free to message me if you ever have any questions- and if I don’t know the answer, I will try to find you somebody who does!

Happy shipping!

Japan Life · Misawa Guides

Japan Post International Shipping for Home Based Businesses

Holy moly, it took me a while to figure all of this out, but I am so excited to share and hopefully help other makers who are serving tours in Japan help their businesses thrive.

Below I will share the shipping process for the off base Japanese Post Office, because it is really the only way we as business owners stationed in Japan, are able to ship things back to the states or internationally. The use of the APO system for business purposes is not allowed, but thankfully there is another option!

I will preface all of this by saying that I am using the ETSY platform for my selling and shipping online. Etsy collects the correct necessary taxes based on the buyer’s location (including overseas VAT taxes) and remits them to the correct jurisdictions on your behalf. I visited the legal office at Misawa to ensure that my using of the off base post office would be legal if I were to open an Etsy shop for my hair bows and other creations, and that SOFA would not be violated somehow. I was given the go-ahead by legal. I believe that Shopify functions similarly, and other platforms may as well. Be aware that when selling to an international address, often VAT taxes need to be charged and sent to the correct jurisdictions. Because of this, I would recommend against selling independently, and would lean towards using a platform like Etsy.

If you’d like to open an Etsy for the first time, clicking on my referral link here will give you your first 40 listings for free!

ALL OF THIS TO SAY, I CANNOT GIVE YOU LEGAL OR TAX ADVICE AND THIS BLOG POST IS NOT MEANT TO BE SUCH. If you are concerned about your own business and the legalities behind it, PLEASE visit your legal office or consult a tax professional.

**Do be aware that the options as of writing this in February 2021 are limited due to Covid-19. When options change again, I will update this post.**

***Prices are due to change April 1, 2021 for most packages sent to the USA through this system***

___

The cheapest and easiest route I have found so far, at least for smaller and easily packed items?
International Mail My Page Service.

Basically, Japan Post has several options for sending smaller, lighter packages internationally for a discounted rate, and they have an online system in place for printing out your customs labels. I was actually fairly surprised at how big of packages they allowed to be shipped this way, and the speeds at which they can reach the US if you are willing to pay a little more.

In order to use their online shipping options, you will need a few basic things:

  1. A postage scale that weighs in GRAMS/KG.
    This is the one that I have been using since 2017 for any sort of package mailing even in the states, and it has always been accurate for me. I will be purchasing this slightly bigger option (for wider packages) this week though.
  2. Regular packaging/mailing supplies for securely sending your products.
  3. A printer or access to somewhere that you are able to print your customs forms.
  4. The “pouches” that Japan Post requires that you use for this kind of shipment.
  5. Yen for the post office for when you send your item. (Still unsure if Japan Post in Misawa takes card, every time I have sent a package it has been a small enough fee for me to just use yen. Next time when I have a bigger group of packages to be sent all at once, I will confirm if they will accept American credit cards or not.)

Here is the process for the Japan Post online shipping account, in a nutshell.

You will create an online profile on the JP website that will be your “shipping profile.” You can save addresses here and enter recipients’ addresses. For your own address, you will use your “Japanese” address instead of your APO box. Thus, anything you have sent to this address will come straight to your door, NOT the base post office.
Your online account simply serves as a way to pre-estimate your shipping costs and create the customs forms for your package.
Once you create your account, you will order the “pouches” that Japan Post requires for this type of shipping. These are free, and are delivered right to your door as well. The pouches simply serve as a waterproof barrier on the outside of your package in which you will place your customs forms.
Once you have created your account and have ordered and received these adhesive pouches, you are ready to begin shipping!

____

Now I will go into the super duper detailed version of the process, along with the tips I have found useful in the few times I have shipped. My apologies for the length of this post, there’s just SO much information in regards to how this process works if you have never dealt with any of it before!

____

First, you will need to create an account through Japan Post online.
Japan Post has an option for translating everything into English. Find that, and select it.

(Scroll to the bottom of the home page. Click “About using this site.”

Then, click the far right option on the top of the next page that says “English.”)


There you go, everything is now in English.

The page you will land on after clicking the English option is the main index page for sending domestic (in Japan) as well as international options.
I’ll link it here in case it doesn’t automatically pull up for you.
This page will give you links to ALL of the available services (and most of the pricing) through Japan Post.

To create an online account, next click on Express Mail Service under the “Sending Overseas” column.


Here you will find the main page for EMS shipping. The main page looks like this, you will see in the upper right hand corner an option to “log in here.” Click this, you will come to a page where you can create your own account.

The next page will give you the option to create an account as an individual or a corporation. I chose to create a corporate customer account. (The difference between individual accounts and corporate accounts is simply how many addresses you can store! I chose the corporate account, because I have repeat customers I ship to, and it is nice to not have to re-enter their addresses every time.)

Next, you will fill out the form that appears.
To help,
Misawa Air Base has a Japanese postal code of 033-0012
Your prefecture is Aomori, which is the SECOND option on the drop-down list (match the kanji to the image below to be sure.)
Your city/town/village will be Misawa-Shi
Your street number is the actual street on base that you live on (i.e. Yellowstone, Thunderjet, etc.) AND Misawa Air Base
(Sometimes on the website there is an “address line 2” available, if so, place Misawa Air Base in this line. You MUST include Misawa Air Base in your address somewhere, as this part of your address somewhat functions as your “chome” or the district of the city in which you live.)
The floor of condo/etc. is your building number and house letter (i.e. tower 117, 9B or 321A)
If you ever need to know Aomori in kanji, it looks like this:

I entered our old address on base to show you the tricky parts of the address entry:

On the lines below these, I only entered my email address. (I did not fill out the “email address of a cellular phone” lines.)
Next, it will ask you to create a password and fill in your secret questions.

Then, you will fill out a brief survey regarding what you intend to use Japan Post for. Do your best to answer the questions to the best of your knowledge. These are my answers, which may or may not be different from yours.

When you have finished, click “accept.” You will then be emailed a “pre-registration link.” You will not be able to use your account until you confirm your account through email. Go to your email, click the link.
Bam, you are now the proud owner of a Japan Post shipping account.

Your home page will look like this once you have logged in.
Your next step will be to click “order pouch.”
These are the little customs document holders that are adhesive and have to be stuck to the outside of your packages.

The next page that comes up will be your request for pouches. To start off with, I requested 20. Use your “Japanese address” as listed in your account from what we entered above.

Press confirm, then confirm one more time, and your pouches will be shipped directly to your door on base. It took around two business days for mine to arrive each time. I happened to be home both times that mine were delivered, but I am assuming they will leave them in a bag on your doorknob if you are not home as well.


Once you receive your pouches, you are ready to ship!

____

To ship a package, on the main menu, click “create labels.”
The process of creating a label is much like USPS in the states, and is fairly self-explanatory. I will go step by step with you.

STEP ONE

You will select your sender information, which should be saved in your account as your Japanese address.
If your sender address does not automatically pull up, enter it manually. You will enter the various pieces of your “Japanese address” as follows, if the sender entry does not pull up automatically:

STEP TWO

Then, you will enter the address of your recipient.

I won’t include a screenshot for this one, because USA addresses will be entered exactly as you would for any USPS package in the states. Easy peasy!
If you are not shipping to a company and only an individual customer, on the required “company” slot, just click on the line and hit the spacebar to leave it blank.

Address 1 will be the house number, address 2 will be the street name, and address 3 will be the city that you are shipping to. Click register once you have filled out the full address.

STEP THREE
The next page will be your actual contents page for customs. Here is where you will choose the speed/type of delivery you’d like, as well as enter the contents of the package and the weight. Package contents and the weight/value of each item is the same concept as a USPS customs form. Each slot will tell you if it wants the value in USD or JPY.

Now, for a brief explanation of the shipping types as shown above.
***CURRENTLY BECAUSE OF COVID-19, OVER HALF OF THE REGULAR OPTIONS ARE UNAVAILABLE. You will only have the options of International ePacket, Postal Parcel, Small Packet, and Printer Matter. For sending packages, your only options currently will be International ePacket and Small Packet.***

Click on the little question mark for a detailed explanation of each, along with the minimum and max sizes/weights allowed for each shipping type.

____

SHIPPING TYPES:
Thank you to my friend Saaya for helping understand the differences between shipping types!

Postal parcels are regular mail like letters, bills, or cards. This will not be an option you select if you are shipping an actual package. Even if you choose to use this option for small letters/postcards, tracking will not be available.

EMS (Goods) will usually be your fastest option for sending items to the states, and is typically used to send larger items. This option is the most like “priority express” in the states. EMS mail will come with tracking as well as insurance. This will also be very pricey, but has the ability to deliver items overseas in a matter of days instead of weeks. At a bare minimum for the smallest package, expect to spend around $20 for this option, with prices increasing as packages get larger.

International EPacket and International EPacket light are one of the best options for small packages. EPacket will be sent by “air” and will come with up to 6000yen insurance. EPacket light is by SAL (slow air mail) with NO insurance, but does include tracking.

Small Packet shipping will be one of the most cost effective options, but it will also be one of the slowest, and will not include tracking (to my understanding. I will update if this is untrue, but the “tracking number” I received has not updated at all.) You may also customize this shipping type by choosing to add tracking or insurance for an additional fee. These will be chosen AT the post office, not online though, so you will have to be able to communicate that you would like to add these.
So far, I have used chosen to only use Small Packet shipping for my packages of hair bows. I click the regular “small packet” option, then click “air.”
Small packet shipping is available in 3 speeds- AIR, SAL, and SURFACE. They are pretty much exactly how they sound- air mail, slow air mail, and surface (boat) mail, respectively. The difference on price is honestly quite tiny, so I have always gone with air mail.

(Currently it sounds like air mail is the only option due to Covid-19, for both ePacket and Small Packet shipping.)
You can use this tool to estimate your shipping costs for the various types of mailing.
When using the tool, if you are in Misawa you will be shipping from “Aomori.”
Calculate your package weight (after completely packed, remember that packaging materials will always add weight) in GRAMS, then select which country and state you will be shipping to. You will then see an estimate for all of the available shipping types. If you click on the question marks beside shipping types, you can also see the limits for package sizes. Note that there are both maximum AND minimum sizes for shipping.

____

Next, you will enter your content descriptions. I took a package to the post office last week with a simple description in English of “hair bows” but it caused a bit of headache for the postal worker, as she was unable to read the English had to translate it and key it in manually. If sending to the USA, you MUST have your contents listed in English, though!
If you write your contents only in English with no code added, I would recommend bringing in a translated sticky note of what your contents are.
There is a line for the harmonized system (HS) code- filling this in may make the process easier too.
Here is the HS code list for customs forms if you would like to look up your own code. You can also search for the code on Google.
For example, my hair bows have a HS code of 9615900.

Be sure to accurately describe the quantity, estimated value, and description of all of your items in the customs form.
When you have finished adding items, hit register and certify that you are not sending hazardous materials.

STEP FOUR
Enter your shipping date. Be sure to pick the day you will actually be shipping the items out from the Post Office, not just the day you print your customs form.

Next, enter your gross weight. This will be the total weight of the package after all packaging materials have been added. I don’t typically weigh the package until it is sealed and the adhesive pouch is added to the outside. I typically add about 8 grams to this total for what the customs forms themself will weigh.

Once you add your gross weight, you will see the shipping cost. This row will also tell you if your package has insurance automatically via the shipping method you selected. If no insurance is listed, and the option is not available to add online, you can ask for insurance at the post office counter if you would like to add it.

Next, you will select if you want an invoice printed or not.

Then you will declare whether your products have commercial value or not. I am still somewhat unclear on the process of tarriffs in regards to us being USA citizens sending to the US. If you have questions about this one, I won’t give you a recommendation either way- contact a tax professional so I don’t mess up your business haha.

After this, you will select how often you want to be notified of the progress of your package, and how often your customer wants to be notified.

When you are finished with all of this, hit submit.

Hit “register shipment” and BAM. You have created your first shipping label.

IMPORTANT: YOU MAY ONLY PRINT YOUR CUSTOMS FORMS FOR SHIPPING ONCE. Make sure your printer is turned on and ready to print before you actually hit print. If your ink messes up or the page refreshes before printing, you will have to cancel your shipment and redo it. The “reprint” option is only for your own records, it does not work for shipping at the post office once your initial forms have been printed. Be sure that a bar code has printed on your document. If there is no bar code present, you likely have printed a copy, and not the original.

Print all your required documents, and you are ready to head to the post office!

Do NOT put the forms in the pouch yet, and DO NOT seal the pouch. You will present your forms and your package to the postal worker, and they will put them inside the pouch for you. You will likely have to fill out one more certification form at the post office stating that you are not sending hazardous materials, and will have to sign and date 1-2 forms at the time of sending.

Once you present your package and documents, they will scan the package into the system, and you may pay for your package.

Viola! You have shipped internationally through Japan Post.

___

Tracking can be found on your main menu under “shipping history.” Select the shipment you are looking for, and click “track and trace.” You will then be able to see any updated tracking information for your package, if the package comes with tracking!

I hope this has helped you better understand how to begin shipping through the off base post office. It is a process to figure out via trail and error, so you will likely have to do a little of your own research to figure out which shipping method works best for what you are looking for!

If you have any questions, feel free to DM me on Instagram @joyfulcrew! I am a little slow to respond to messages sometimes (three kid problems, right?) but I will always help however I can!

Happy shipping!

Home · Rental Decorating

Master Bedroom Decor | Misawa Japan Home Inspiration

It has taken me over two years to finally ALMOST finish decorating the whole house here in Japan. I have been focusing on the master bedroom lately, and I think I have FINALLY finished with it- for the time being at least. I like to change things often, as Drew knows and LOVES. I mean TDYs are only for painting walls and building new furniture while your husband is gone, no?

Also, pro tip. When we got married 5 years ago, Drew told me no florals, no girly things, no pink in our home unless it was in my office. I do not have an office here. It has taken me almost 5 years to slowly and discreetly integrate my love of flowers and pink/purple into our home, but I have done it, and he still lives here willingly. You’re welcome, ladies.

This is a 3 bedroom townhome on Main Base in Misawa. We have the “B” unit, and our style of home is one with the fully covered porch on the front. The front door opens directly to face the stairs with the kitchen to the left.


Below are all the product links for you to shop. These are active as of December 2019! If something doesn’t work in the future, you can always DM me on Instagram, and I can try to find an updated link for you, or at least give you the retailer.

Bed + Bedding

Bed frame

Our bed is a king size, and the frame is the BEST thing we have ever bought. SO easy with moving and assembly.

Flannel Sheets

They don’t currently have the print shown here in stock, but I linked the most similar one. We have like 4 sets of these flannel sheets and rotate them weekly all winter long. SO soft and they wash so well too.

Quilt

My current top quilt as shown in the grey color on the bed is sold out, but I will link the one below from Kohl’s that is the closest to mine! Sonoma consistently makes quality stuff, especially in bedding!

Pom Duvet Cover
(+ Duvet insert) 
I have washed this several times since I got it like a month ago (darn dirty kids!) and it has held up beautifully. I even wash the duvet and cover together, then dry it partially and just spread it out over the couch to dry all night. Works great. Not sure why the reviews are only 4/5 on it, because I would give it 5.

Herringbone Purple Blanket

Still searching for this one! Originally got it as a wedding gift from Target. It’s Threshold brand and SUPER heavy, but I do not currently see anything like it on the site.

Striped blanket

The blanket sitting in the crate at the end of the bed is actually originally from Target on clearance, and I can’t seem to find one that is similar or reasonably priced, so I linked the most similar and best priced one on Amazon I could find!

Decor above the bed-

Unfortunately I can’t link these little wood planks, because I created them by destructing a wooden box lamp I found that was soaking wet on the curb haha.

The floral arrangement is also made by yours truly, from a stick I found in my front yard, some twine from a package I was about to throw away, and like 10 stems of Daiso flowers. I may sell these in the future- shoot me a DM on Instagram if you would be interested!

Pom Pillows

Bless This Nest Pillow Cover

Mandala Pillows

I linked the closest I could find to these. I wish I could link the originals, because I have loved them for YEARS. Originally from Kohl’s!


Shelf Decor

When I first saw the setup of the master bedroom, I wasn’t sure our King size bed, dresser, etc. etc. would fit.

Spoiler: put your dressers in your closets if you want more floor space. Makes sense anyway- the rest of your clothes are already there.

We use the top of our dresser to store our towels since the cabinet space is lacking in the townhome bathrooms anyway. Keeps things nice and uncluttered in the bedroom.

Then, to get even more floor space, I built shelves and put everything on the wall.

Be sure to either find your studs (ours are solid metal for sure, so we can’t drill into them) or HEAVILY anchor shelving. Also, I highly do NOT recommend placing anything heavy on the shelves unless you want an entire wall’s worth of drywall on your floor. I’m super careful about putting any weight on these!

All three were a TDY project- just some wood from Homac and stain from Daiso!

Floral Arrangement

“Blessed” Sign

Amy is local to Misawa, so message her if you need something custom made!

Tobacco Basket

This is a set of 3 tobacco baskets from Target, and is only $9 for the set! The white basket on the wall below is also from it. Follow the “bullseye’s playground” seasonally online- this kind of gorgeous stuff is added ALL the time!

The other tan baskets above are all from Daiso or Seria! They are also currently hung with push pins as shown. Don’t judge me, sometimes ya’ just can’t disrupt nap time by hammering into the wall.

“And” Sign

Kohl’s JUST stinkin’ took down the listing for this sign, and I’m bummed because it’s SO beautifully carved! I linked a similar style one.

White Frame & Tan Frame 

Both frames above are from Belle Maison from Kohl’s, but neither are sold anymore. I linked a pretty similar one from Amazon above! I have never disliked anything I have bought from the Belle Maison line at Kohl’s, though!

Container for Sand Dollars

So I only add this one in here, because I love this DIY hack. Woodwick candles are one of my favorite candles (despite the awful things that candles release into the air haha) and I LOVE reusing the jars! I use a lighter and melt most of the wax out of the jar when I am down to the last little bit, then just run it through the dishwasher to make sure it’s completely clean. Perfect for cotton balls, q-tips, sea glass, or sand dollars.

P.s.this is the best beach for finding whole, huge sand dollars in Misawa, Japan!

Small plants & pots are all from Daiso!

Diffuser

I have 3 of these in my home, and do not regret it. Join my deals group– I post cute diffusers there all the time. I got both of mine in this style for $7! (Yes, it is originally $28!)

Both floral arrangements are from Daiso. I really like fake flowers, y’all. Both vases were thrifted! (If you’re E4 & below, take full advantage of your thrift store credit each month! The thrift store is the BEST.)

White picture frame

This it the 16×20 and I have like 6 of these in my house and love them. Wait until they go on sale- sometimes they are like $14!

Framed sign

Amy is so talented, and beware- you will want everything from her shop. She’s also local in Misawa, so message her if you need something custom made!


Nightstands

Nightstands

I picked these nightstands up on the curb, but they are originally from Ashley Furniture! I personally think they look better and have more character as they age and get scratched. If I can ever find the EXACT stands I will link them, but for now I linked basically the exact same stand, just slightly less rounded edges.

Lamps

Just got these from Target about a week ago and couldn’t love them more.

All of the florals seen on my nightstands were also made from Daiso flowers.

The wooden pieces that the lamps are on come from the curb (small box) and beachcombing (round planks.) Trash is treasure, y’all! Also full disclosure, beachcombing is massively addictive.

Basket holding my books

These are seriously the best baskets ever. We have the small versions for things like my books, and the large ones for Henry and Ellie’s toys.

Also, I love ALL THINGS from this seller. La Jolie Muse is my most purchased from vendor on Amazon. (Again, join the deals group. I post codes from her all the time!)

Rug

This is the 5’x7′ version, which unbelievably SHIPS APO! Took about 2 months to arrive for me, but so worth it. NuLoom is my jam, you’ll hear me rave about them nonstop. I think we have 4 rugs from them. All have shipped here! (Sorry post office volunteers and staff, I know you hate me.)

Ottoman

Still trying to find this bad boy online. I bought it at Kohl’s years ago on clearance for $5. Story of my life.


Blanket Storage & The Rest

Blanket Ladder

I actually picked this up off the BEACH! Favorite find during beachcombing so far, minus my floats of course. It came from some sort of boat, and as soon as I saw it I knew it would be in my home.

Top Blanket

These blankets from Cuddl Duds are the BEST. SO cozy, and they stay SO soft even after washing. I have 4 and want 3 more.

Middle Blanket

This one came with a comforter set from Target that is in Henry’s room. Don’t try to find it, just buy a Cuddl Duds blanket. You’re welcome.

Bottom Blanket

Wreath

Also a Daiso creation of mine, but I have a tutorial for it HERE!

Letterboard

This one came from Amazon, but you should absolutely join my deals group instead of buying one for full price. I post letter boards constantly there with codes making them $3-$7ish!

Ledge Shelf

It doesn’t have great reviews on Kohls.com, but I love mine! Just don’t hang or put anything too terribly heavy on it, because it is small and lightweight.

Curtains

These are longer than the wall, #1 because the curtain rod is actually currently kind of hanging out of the wall due to my children, and #2 because I can’t stand too-short curtains. I order the 95″ ones for the Misawa housing because I prefer ceiling to ground curtains, 100%.

Also, hack for you: A small floor length mirror fits perfectly for us behind the sliding door to our bathroom! Not sure if every townhome is this way, but it’s the perfect way to hide a $10 mirror and not look like you just rolled out of bed each morning.
(If you know me, you know this door stays opened in front of the mirror a lot, clearly. Haha.)


ALSO,  know that 90% of the time, my bedroom has dirty clothes, papers, legos, dishes, and probably the socks I slipped off my feet at 2am on the floor. Most of these photos I pushed crap out of the way to photograph the nice clean composition, and my life is just as chaotic and cluttered as yours. Don’t look at my photos like I look at those on Instagram and wish your house were as clean as mine, because there is undeniably a dirty diaper resting under my bed right now, and I am okay with that.
signature(heart)


Desserts · Hospitality Food | Meal Trains · Recipes

Starbucks Copycat Banana Bread | Dairy Free

If you are my husband, you know that I have spent the last approximately 6 months perfecting this recipe. I have made this over and over and over and over, just slightly tweaking little things until I finally settled on this recipe that I personally love.

Let me preface this: I hated banana bread. Like the stuff used to make me want to puke. I LOATHED it. At least until I tried the Starbucks banana bread. It was sweet, not dry at all, and it didn’t reek of old bananas. That stuff was GOOD.

So, I decided to figure out how to make it myself.

Let me also add that this recipe is 100% dairy and lactose free if you use almond or coconut milk. I like to use the almond-coconut mix from Silk.

This recipe has a crusted outer side, and a moist and very soft inner bread. You can choose to add walnuts (Drew’s favorite) or totally leave them out (my favorite.)

My secret to sweet and perfectly moist, yet fully cooked bread?

Baby food.

Weird, right? Trust me! Read on.

D14CBB3D-8219-4C71-A15B-458A35F8CD39

Starbucks Copycat Banana Bread

  • Servings: 8-10
  • Difficulty: easy
  • Print

Ingredients

2 cups flour
1.5 cups sugar
1 teaspoon baking soda
1 teaspoon salt
1 egg
1/2 cup vegetable oil
2 tablespoons milk (use coconut or almond to make it dairy free)
2 teaspoons vanilla
2 bananas, peeled and completely smashed
1 tub of banana puree baby food (I use the 4oz tub or 3.5oz squeezy pouch)
(If you don’t have a tub, you can use 3 bananas.)
optional 1/2 cup walnuts

Instructions

1. Preheat your oven to 325°F.
2. Mix flour, salt, and baking soda together in a bowl. Set aside.
3. In a separate bowl, mix the egg, sugar, and oil until combined. Do not over-beat the eggs.
4. Add dry ingredients in and scrape the sides of your bowl several times while mixing.
5. Peel your bananas, and smash them with a spoon. Add the baby food puree to the ones you smashed and mix all the bananas together.
6. Add banana mixture, milk, and vanilla to the main bowl and mix well.
7. Mix in walnuts if desired (optional.)
8. Grease a bread pan, or a small Corningware dish. Pour batter into the dish.
9. Bake for 60-70 minutes, taking out when a skewer comes out clean when inserted to the middle of the bread. The top will brown rather early, but feel free to check with the skewer multiple times if you are worried about over-baking.

Enjoy!


  1. Gather your ingredients, and preheat your oven to 325°F.C862A6C7-61AF-4D3B-9197-3D68B513462A
  2. Mix your flour, salt, and baking soda together in a bowl.
  3. In a separate bowl, mix the egg, sugar, and oil until combined. Make sure you do not over-mix, as beating the eggs too much can change the consistency of the bread at the end.433E22A5-DB76-46D0-B7FF-652C7D267AC0
  4. Add your dry ingredients in and scrape the sides of your bowl several times, as the sugar and eggs like to coagulate on the sides once you add your dry mixture.93BD55CD-2933-4EEB-A781-4105295F11D3574D6A00-F620-45D4-BEC3-33C809AC4760
  5. Peel your bananas, and smash them with a spoon. Bananas that are very spotted, but not quite fully brown are my favorite to use. Of course, banana bread is great for using older bananas. You can also use newer, totally ripe bananas, but they will be much more difficult to smash. Once fully smashed, add in the pouch or jar of banana baby food to your banana mixture, and mix well.
  6. Add your banana mixture, milk, and vanilla to the main bowl, and mix well.BF77A94C-DE54-4929-A2C8-F5C5DC6D3B73
  7. Add in your walnuts if desired.
  8. Grease a bread pan, or a small Corningware dish. My favorite is this 1.5qt Corningware casserole dish, because it makes a very long and short slice of bread. Pour your batter into the dish.
  9. Bake for 60-70 minutes, taking out when a skewer comes out clean when inserted to the middle of the bread. Right at 65 minutes is perfect for our oven. The top will brown rather early, but feel free to check with the skewer multiple times if you are worried about over-baking.
  10. Make sure you make this recipe when you have friends coming over, because it will make your house smell AMAZING. You’re welcome.3C5A925C-DDB3-479E-8B39-230B6FC382AA

This is a weekly recipe in our house now, and the kids now beg often for some “buh-nuh-nan-na bread.”

Enjoy!

signature(heart)

Shop my favorites from this post:

Parenting · Shop My Instagram

How Great is Our God + Giveaway

We recently received How Great is Our God by Louie Giglio to review from my sweet friends at FrontGate Media, and this book is absolutely a gem. While I received this book for review purposes, all opinions are my own, as always.

A sweet, small-enough-to-carry little book, filled with beautiful and exciting images about God, space, the human body, the environment, and the universe. We have been reading 1-2 devotionals per night to Henry, and even his 3 year old self asks questions about the stories.

The book is directed at 6-10 year olds, but Henry absolutely adores the book at age 3.5. We like to read him books that are a little bit above his age level , because it encourages him to ask questions and expand his thinking.

We read to our sweet babes often, and believe that there’s no such thing as too much curiosity when it comes to books and just learning in general. This book is an awesome way to teach your littles fun facts about things they are curious about in the world, and in a faith-based and intentional manner.

Be sure to enter this giveaway to win your own copy!

You can also purchase the book for yourself here! It hangs out right around $14 for the 100 devotionals.

Happy reading!

Japan Life · Japan Life Updates · Our Life in Japan · Travel Guides

Blueberry Picking |Misawa, Aomori

Here are the basics:

• stroller friendly, though I would recommend wearing babies instead • I would not bring pets to this particular farm • awesome for even young kids- no thorns on the fruit plants, so even our 11 month old picked her own berries •

Hours: I will update the hours once I find my photo of the sign, sorry! We usually go around 2-3pm.
Usually berries are the ripest during the last week of July.
Directly from base, only about a 20 min drive.

40.783798, 141.363129

Our second year to visit this farm, and I am finally confident enough that y’all need to visit to release the pin. This may be a commonly visited farm, but we stumbled upon it without a pin, and I LOVE the owners. So kind, always so good to our kids, and their berries are amazing.

Entry fees are 500¥ per person, and both of our kids were free. To take out blueberries, you will pay 120¥/100 grams, which is DIRT CHEAP compared to ANY blueberry prices at local grocery stores. If I remember correctly, children under age 7 eat for free.

In total, we paid exactly 2000¥ for all-you-can-eat blueberries, and an additional gallon sized ziplock full of blueberries. The owners of this farm always encourage us to eat, eat, eat- especially towards the end of the season. They provide buckets to pick with, and even have small baskets for children.

This particular farm has always been extremely quiet, with lots of options as to areas that you can pick from. We have never even felt like we were picking around other people. 

Park directly in front of the greenhouse, when you drive in you will see the family’s house to the left, and the greenhouse to the right. There is a small parking area between the two.
As is often customary in Japan, this is both the family’s home, and their business. Make sure you are respectful, as this is where they live.

Blueberry and mud face

I would recommend wearing/bringing bug spray- the mosquitoes aren’t bad here, but the ants are. Honestly they weren’t pesky enough to pose a problem this year, but I remember they were THICK last year.

If you want to know what life with Henry is like right now, this is it. Constantly shaking a stick or toy at you saying “pew pew pew pew pew!”

This family is extremely gracious, and almost always gives us a “free gift” or knocks down the price a little bit. Last year at the end of the season, when the berries were ripe, ripe, ripe, we took home almost 4lbs of berries for around $9.90.

Edit-00777
Last year: This was the first bag we picked, we went home with around 4x this many berries.

If you’re new to Misawa, make sure you also check out my post on cherry picking. We are planning to hit the apple farms, strawberry farms, and maybe even pick some raspberries this year too.

Enjoy! The berries are delicious!

signature(heart)


Japan Life Updates · Travel Guides

Hotokegaura Rock Formations |Shimokita Peninsula

This is a part of our Mutsu area trip, scroll to the bottom to check out my links & recommendations for the entire weekend trip.

Here are the basics:
• NOT stroller friendly • probably pet friendly • Good for kids* (see below) • FREE entry •

Hours: 24/7, from what I can gather
Boat tour leaves from the town of Sai
I recommend only going May 1-October 31-ish. These roads will be completely snowed in during the winter.
Directly from base, this is only about a 2 hr, 40 min drive. From the Gates of Hell, it was only around 1 hr, 30 mins.

41.311349, 140.809338

The above pin will take you directly to the parking area. You will make the trek down to the cove via the trail that begins right next to the “beware of bears” sign. Don’t worry, we took our children in and we all survived.


Edit-08718Edit-08837This is one of the most gorgeous places I have been to in Japan thus far, and I 100% recommend making the trek to see it too before you leave the country. That being said, this is a HIKE with kids. The trip down the side of the mountain was pretty much cake, other than the burning calves we both had at the end from each bearing the extra weight of a kiddo. The trip back up? Ahhhhh, not so much cake. We had been making fun of the “rest stop” benches at various places on the stairs on the way down… but alas, on the way back we ate our words and rested our butts on those same benches. Haha. Edit-08716Edit-08822

My face to the “BEWARE BEARS” sign and the massive trek back up the mountainside.

As mentioned, be aware that this is an area where bears reside- as you make your hike to and from the rock formations, make sure to frequently talk and vocalize. If you have never hiked in a bear inhabited area, this is the way that you consistently let them know where you are. If there’s one thing bears do not like, it’s being surprised by a human. If you are really concerned, you can buy a bear bell before going.joyfulcrew.com 8.jpgEdit-08722ALSO, be aware that there are apparently wild monkeys in this area too. I saw one cross the road behind us briefly and seriously almost started running, because I could not FATHOM what I had witnessed crossing the path in the manner that it did. It was only later in the day when we saw wild monkeys on the highway that I realized this was exactly what I saw.Edit-08843Edit-08839But anyway,

This. Area. Is. Beautiful.

The hike is somewhat brutal, but it is SO worth it, even when we had to carry two small kids up and down the side of the mountain. Again, I wore Ellie in my LilleBaby, and honestly, if we had a second carrier, Drew probably would have worn Henry too. It makes it SO much easier to just have the kids on your back if they are little.Edit-08731Edit-08734There is a ferry/boat that does tours of the cove- we chose to just explore it by foot, especially since we weren’t sure of the hours, and since we didn’t actually make it up to Sai. We figured it would be less stressful with the kids to see things from the actual coast, too. Totally don’t regret choosing the hike/coast route.Edit-08742The water is crystal clear, and Henry LOVED seeing the starfish, sea urchins, jellyfish, and tiny fish swimming through the water below him. The rocks to the create tons of tide pools, and we got to see some pretty neat sea anemone too.Sea glass abounds on the shorelines, and I wouldn’t be surprised to find a glass float here if you arrive early and before it has been picked over. The area is stunning, and I 100% would not have been upset to spend several hours just sitting on the beach listening to the quiet waves.Edit-08805Edit-08777Historically, this is called Buddha’s cove, and carries the same sort of ominous atmosphere as the Gates of Hell. The mysterious towering cliffs are formed by volcanic activity and the constant beating of the waves along the rocks, and they are unlike anything I have ever seen. They are mysterious and breathtaking, to say the least. Photos just do not do this area justice. The quiet, calm nature of the shoreline while we were there was something I could have just taken in all day.

Absolutely a must-see, and I highly recommend taking your families here too if they visit!

signature(heart)

Japan Life Updates · Travel Guides

Mutsu Area Weekend Road Trip- July 5 & 6

We had the BEST weekend, and I have like… 500 photos to prove it. I split this post into two separate posts- one for each of the main stops we made, simply because there is SO much information, and SO many photos from each one.Edit-08567Edit-08593We chose to make this a 2-day road trip, simply for the fact that it is honestly easier on us with our young kids. You could easily see everything you would like to in the Mutsu area on a regular weekend via car. We probably only spent around $30 on gas total.
If you woke up early in the day and got on the road, you could do this in one day, though I personally recommend taking a full two days, and adding the wild monkey observatory into your trip. We missed out on the wild horses too- we still need to check that off the bucket list.Edit-08718Edit-08750Edit-08734We left the house around 2pm on Saturday, and checked into our hotel around 5pm. We actually left the house and drove to Mutsu without any hotel reservations- we figured either we would find something that was available, or we would just drive back to base if luck wasn’t on our side. Turns out there were plenty of rooms in Mutsu, and the language barrier didn’t pose any issues at all. We walked down the street from the hotel to find dinner and then went to bed early to wake up and road trip the entire next day.Edit-08731If you’re new here on my blog, our kiddos are two (three this coming weekend… *sniff*) and 10 months old. They did awesome on the trip, but make sure you check out each individual post, because I definitely have my recommendations about bringing kiddos to the various places that we stopped. Our kids are pretty quiet, calm, and laid back (and they fall asleep anywhere and everywhere, clearly.) If you have rambunctious or restless littles, this may not be the best trip for you to take them on.img_6788We visited the Gates of Hell first, then road tripped through the mountains to visit the rock formations of the West coast of Mutsu Bay / the Sea of Japan. The mountain drive is BEAUTIFUL. Stop at any restrooms/rest stops that look pretty, because there are some real gems tucked away in this area. We traveled along 338 on the way back to find the wild monkeys (we didn’t stop at the sanctuary- they are THICK along the sides of the road, so we just saw them as we drove through) and had the weather been a little nicer towards the end of the day, we probably would have stopped to hunt a few beaches for glass floats.Edit-08675

joyfulcrew.com 7.jpg
The mountain road itself is worth the drive.

We traveled from Misawa along the western coast road to our hotel, Plaza Hotel Mutsu. It was around 12000¥ for our night, but we each had a twin size bed, there was a pull-out couch, and the room was big enough for the kids to roam freely. Wifi was free. The bathroom was also one of the largest we have ever had during a Japanese hotel stay, so overall I would highly recommend this hotel. Lawson’s, McDonald’s, KFC/Pizza Hut, and a yakiniku place that we did not get a chance to try were all within walking distance, and parking was free.

Edit-08416
We pushed the couch to the end of the two twin sized beds in order to make Ellie a makeshift play pen. We pulled an extra quilt flat across the floor, and she slept safely there. (Safe sleep always, y’all!)

joyfulcrew.com 6.jpg
The view that they gave us from our hotel was gorgeous from the 6th floor- overlooking the Bay.

Here are individual links to my posts on each place we visited. These are the two places in the Mutsu area that I 110% recommend visiting before you leave Japan.

Gates of Hell | Mount Osoresan

Hotokegaura Rock Formations |Shimokita Peninsula

And then, here are a couple more pins that we DID NOT visit yet, but that I’ve seen recommended for this area. We plan to visit these, just didn’t have time in the two days we devoted to driving up in the area, especially since we left late in the day on Saturday. I will update this guide when we have visited each.

Wakinosawa Village Wild Monkey Park- 41.167784, 140.804523
Hours: 0900-1630, open all 7 days per Google
We chose to simply drive highway 338 on the way home from the rock formations, because it drives directly past this, and the park was already closed. Drive carefully, you will almost certainly see several wild monkeys along the road as you drive.

Shiriyazaki Lighthouse & Wild Horses- 41.429507, 141.461434
Hours: 0800-1545, check Google- the hours change slightly based on the seasons

Edit-08681
Highway 253

As mentioned, we drove up the coast of Mutsu Bay on the way to our hotel. From the hotel, we went straight to the Gates of Hell. From here, we took the mountain road (highway 253) to the west coast to see the rock formations. From the rock formations, we took highway 338 on the way home to make sure that we at least drove past the monkeys. Essentially, we made a HUGE loop. There wasn’t an ugly road that we saw the entire trip.
I HIGHLY recommend it, the entire trip is BEAUTIFUL. I really can’t say that enough. Parts of the trip looked like Arkansas and Tennessee, parts looked like the Smokies. Parts were reminiscent of Yellowstone. Parts had white sand beaches and crystal clear blue water. It is one of the most diverse areas I have ever been to. We filled up on gas before leaving base, and upon pulling into our driveway at the end of the trip, we had only used a little over 1/4 of our little Toyota Raum’s tank. Cheap, easy, and so much fun.

Edit-08794100% worth the gas and the hotel stay- I wish we would have taken our parents/families on this trip while they were visiting!

Make sure to shoot any questions you have to me via DM on Instagram! I answer there best, usually. I’m always happy to answer anything you have to ask, and I am passionate about families LOVING Misawa like we do. Coming from a gal who cried big, ugly tears when she found out this was her family’s assignment, that is saying something.

signature(heart)

Japan Life Updates · Travel Guides

“Gates of Hell” | Mount Osore- Osoresan Bodai-ji Temple

This is a part of our Mutsu area trip, scroll to the bottom to check out my links & recommendations for the entire weekend trip.

Here are the basics:
• NOT stroller friendly • NOT pet friendly • Good for kids • Entry fee (yen only) •

Hours: 0600-1800
Only open May 1-October 31

41.326247, 141.090895

The above pin will take you directly to the parking area.

Edit-08567Edit-08438-2


We had NO idea what to expect when we arrived here. We had heard mixed reviews on this temple from various individuals who have visited before, so we weren’t sure what to expect. We knew there would be some walking, and we knew the place would STINK.

Edit-08576

joyfulcrew.com
We are still working on the peace sign haha.

Here’s what I gathered from our own trip:

  • It smells like eggs.
  • It is VERY quiet. 
  • It is VERY beautiful.
  • It is FULL of amazing Japanese culture.
    Seriously, read my little history excerpt before you go, or research the history for yourself. Knowing the background of the area makes it that much more incredible, and it also gives you a newfound respect for the Japanese that are actively worshipping or praying here.

Edit-08616
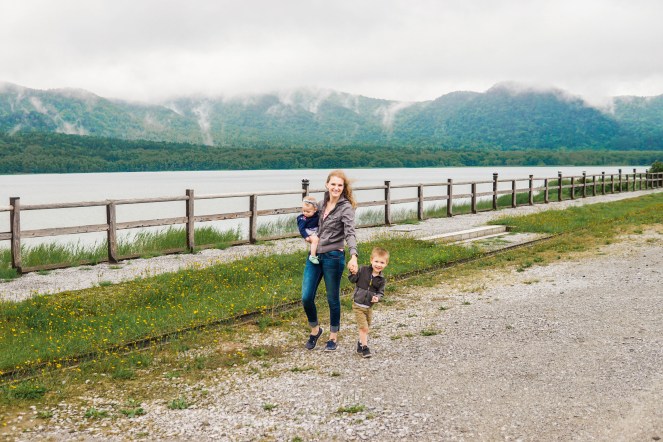
Let me preface ALL of this by saying, this is one of the three most holy places in Japan. If you read the history on the temple, you will appreciate the entire area culturally so much more. Do not bring dogs, in my opinion If you have loud or rambunctious kiddos, I would make this a date-day trip and leave the kids with a sitter. The area is NOT stroller friendly, though I wore my daughter in our LilleBaby carrier without any trouble whatsoever.

Girlfriend just couldn’t hang. The entire area is so quiet and ominous. Who knew that is apparently the perfect lullaby for a 10 month old? Ha

joyfulcrew.com 5

Edit-08586
The bottom quarter of the largest set of steps, Henry sat on Drew’s shoulders the entire time. The view from the top where the shrine lies is beautiful. You can see every bit of the grounds, and the surrounding lake.

Drew and I are pretty active, and we weren’t bothered by the stairs here- but I can definitely see how that many stairs would pose an issue to those with kids. There is only one part of the loop with lots of stairs- the rest of the walk is pretty flat, unpaved walkways.

Edit-08600The area is open May 1st to October 31st, and for good reason. The roads to this area will be 100% snowed in if for some reason the snowy season starts before the closing date of the temple, so do keep this in mind if you go in the late fall.

There is an entry fee of 500¥ per adult, and 200¥ per child age 15 and under. Our kids (2 & 0) were free.

They will provide you a brochure that is written in English- be sure to look at the map before entering. It shows you the flow of traffic through the shrines.joyfulcrew.com 4Okay, now that all of the basics are out of the way, I 100% think this is a place that everyone should visit before leaving Japan. I was unaware of the cultural significance of this location prior to entering and exploring (read the brochure, Emily… come on, right?) and so I did not realize that a few places within the shrine area are completely off limits for photos. In addition, both your shoes AND any hats should be removed before entering any of these buildings. I will explain the significance of this area to the Japanese in just a bit.

joyfulcrew.com 2
Inside of this particular building, photos are NOT allowed.

Actually, lots of shrines are supposed to be photo-free in Japan, particularly those that are enclosed by a building, like the above- something I had NO idea about. This is something I learned from a quick Google search after being given the big “X” from a worker while trying to photograph Henry within a shrine building here. Oops. Lots of “gomen-nasai”s spoken from me this trip.Edit-08548Edit-08628

joyfulcrew.com 3
The yellow ground kept catching Henry off guard.

Here is a little history, from what I learned from the brochure and a few sources online:

Around 1200 years ago, a Buddhist priest had a dream in which a holy monk appeared to him, stating that he was to embark on a 30-day walk in search of a sacred mountain, where he would propagate Buddhism from. Eventually, the priest stumbled upon this volcanic area, realizing quickly that it met all of the requirements told about in his dream, including many geographic numerical markers, matching very specific Buddhist symbols. The priest knew this was the area spoken about in his dream.

With his own hands, he carved a statue of bodhisattva Jizô, and subsequently added a building to house it.

Here is the except directly from the pamphlet that they handed us. This was the most impactful and interesting part to me personally.

As you can imagine, this is a pretty historically important and heavily important place to the Japanese, especially those actively practicing Buddhism, and it gives you a deeper respect for the quiet nature of the area once you know what the worship taking place is all about. Many Japanese come here to pray for their deceased loved ones, and while every Japanese individual we saw met us with “konnichiwa” and smiles at our babies, we absolutely remained quiet unless spoken to, in respect to the natives around us.

Edit-08622We happened to go on a cloudy, misty day, and while we were worried about the dreariness when we woke up, it turns out… it was PERFECT. Some of the reviews I have read since visiting actually state that the entire area blossoms with color under the dreary conditions, and that sunny days are much less saturated with the deep blues, greens, and yellows.
Because the entire area is already somewhat ominous due to the bubbling sulfur pits and burning areas, the dark and dreary day with a mist over the mountains made it that much more dramatic.Edit-08602joyfulcrew.com 1I HIGHLY recommend this being a place that you take your family/friends if they are visiting. It definitely IS kid-friendly, but as mentioned above, just please teach your kiddos that this is a place of reverence for the Japanese, and do your best to abide by that fact as a family while you are inside of the area. As a Christ-following family, we personally choose not to participate in any of the rituals, but we are 100% all about respecting those who do. The Japanese are actively worshipping/ praying- consider how you might have your kids act if they were in a church service.Edit-08593Edit-08502Here are some fun superstitions too that I gathered from a few posts online and on Misawa Asks, if you like that kind of thing.

  • If you pick up a rock in your shoes from the ground within the temple area, and take it home with you, you are said to be taking home a spirit with you
  • Odd numbers are considered good luck within this shrine, with even numbers being considered ominous/bad. You are supposed to visit in odd numbers, and if you visit the area once, do not return, or you will have to visit it again to make it an odd three times. Already messed that one up with our family of four… oops.

Edit-08619Make sure you check out my other two posts about our whole trip up to the Mutsu area, too! This has been one of my favorite trips so far, and I hope y’all love it as much too!

signature(heart)


Shop My Instagram

Kohl’s Sale | July 2

Here are a few of my favorite picks from the Kohl’s 25% off sale. You can stack TWO 25% off coupons with all of these items if you have a Kohl’s Charge- making them dirt cheap!

Use code SUMMER25 and code WINWITH25 for the double percent stacking.

Hurry though, this sale ends tomorrow, July 3. 

Here is the page of everything included in the sale!

Screen Shot 2019-07-02 at 11.13.16 PM.png

And here are all my favorites from the sale, click on the photo for the direct product link.

Shorts are less than $15


Screen Shot 2019-07-02 at 10.34.41 PM
$11.24 with both coupons


Screen Shot 2019-07-02 at 10.35.08 PM
$11.24 with both coupons

Screen Shot 2019-07-02 at 10.42.50 PM
$11.24 with both coupons


Most tanks & tees are less than $5

Screen Shot 2019-07-02 at 10.27.41 PM
$5.61 with both coupons


Screen Shot 2019-07-02 at 9.33.33 PM
$4.49 with both coupons


Screen Shot 2019-07-02 at 10.32.15 PM
$5.61 with both coupons

Most dresses are $11-$18

Screen Shot 2019-07-03 at 12.27.38 AM.png
$18.55 with both coupons

Most sandals are $14 or less

Screen Shot 2019-07-02 at 9.48.46 PM
$14.05 with both coupons

Click on any of the photos above to browse, and make sure you check out the entire sale. I’m placing an order right now, and DYING over how cute some of these styles are!

signature(heart)