


My first cherry blossom season in Misawa was spent wandering about pretty aimlessly, trying to figure out where the best places to view cherry blossoms were. I stuck mostly to base, because I was really afraid of accidentally wandering somewhere that I wasn’t necessarily welcome. And don’t get me wrong there- the blossoms on base are totally worth driving around to see. They are so beautifully and strategically planted, and they are some of the trees that seem to bloom the soonest. As I have explored more of Misawa, I have found that very few places seem to be unwelcome to Americans, as long as you are respectful, clean up after yourself, and don’t let your kids run completely wild. On the contrary, the Japanese at the parks seem to absolutely adore respectful American kiddos.

Last year, I thought the only place to really see blooms was at the Statue of Liberty (Icho) Park. I missed out on some of the most gorgeous blooms, because I spent ALL my time there (also because I had mini sessions nonstop, which was AMAZING, but also so draining.) It definitely is one of the best. But I wish I would have known about all the available parks for blossom viewing within like 20 minutes of base, where to park, and where was the most kid-friendly.
My kiddos were sick this week, so I will be updating this post in the next couple days with more photos and more information about each park.
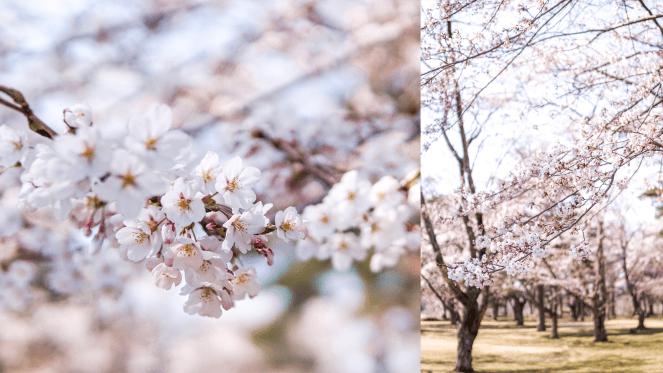
For now, here are some photos of VERY early blooms that I saw at a couple parks I have visited this week- which will be updated soon! (April 24 update.)
Also, here are a few reminders for you about being kind to our Japanese hosts, please don’t take these tips lightly! They may be common sense to most, but I have seen them all happen, which is why I include them.
• Please don’t let your kids pick cherry blossoms or any flowers, for that matter (and don’t pick them yourself.) If you want ONE blossom for a photo or something, that is one thing. But these gorgeous blooms don’t last long, and it’s incredibly sad for me as a photographer to watch other kids stripping entire branches to throw them in the air for one photo, you know? Be smart, and realize that there are a lot of people trying to view these trees in a very tiny amount of time, and half the time a giant rain or winds will strip the branches, anyway. If you want blooms, pick up ones that have already fallen!
• If you go to a dog-friendly park, PICK UP AFTER THEM. Keep your dogs on a tight/close leash, don’t let them jump all over people. I’m a dog lover, but I am absolutely a supporter of keeping your dogs at home if they growl at people or easily escape a leash.
• Try to keep your kiddos under control. Parks are obviously for running and fun (I have a toddler, trust me, I get it,) but I have seen people be drilled in the head with soccer balls by American children at these parks. Realize that these are THE ONLY parks for local Japanese families, and we are visitors in THEIR country.
Lastly,
Komaki and Tateno are VERY close together and could easily be hit in the same day.
Swan and Icho Parks are also VERY close together.
Also, as a disclaimer- these are all Google Maps pins. I know sometimes the difference between Google Maps and Apple Maps can be huge.
1. Statue of Liberty Park (Icho/Oicho Park)
(40.610026, 141.439702)
TONS of blooms here. The entire park is covered.
If you go early in the day, you can park in this lot that the pin takes you directly to. I have always been routed through a very tightly-packed residential area to find the park- it will seem like you are going the wrong way if you are routed this way too. This lot does fill up quickly though, so if it is filled, you will have to take a right out of the parking lot, and drive until you see a one-way street. This will take you to a loop that drives directly above the park (directly above the playgrounds.) When the actual parking lots are filled, overflow parking has always parked on the grass above the park on this loop. I personally do not park here unless I see a JN (non-Y plate) car already parked there, just to be sure it is okay.
• stroller friendly almost completely through, almost all of it is paved walkways
• great place for a picnic when it is not insanely busy
• HUGE State of Liberty
• playgrounds, swings
• completely open areas for kids to run
• giant roller slide
• dog friendly
• large and beautiful lake
• fishing friendly
• has restrooms
This is one of the very best parks to visit for lots and lots of cherry blossoms. There are even a few different kinds of blooms here.
That being said, it gets BUSY towards the end of the day, and especially towards the afternoon on the weekends. During full bloom, the place is sometimes PACKED. It’s sometimes hard to find a parking spot, and the parking in this park is a little squirrely sometimes. I recommend visiting Icho for SURE, but recommend going during the early morning, or on a weekday. (Sunrise in Icho is spectacular, you NEED to see it.)
2. Swan Park (Hachinohekitakyuryoshimoda Park)
(40.611883, 141.401523)
TONS of blooms here. The entire park is pretty much covered.
This is the one park I have not visited yet- I will update this description in a little more detail in the next few days. You can Google images, or search Misawa Asks for more info on this one. (Swans come out in the winter, so don’t expect to see them in the spring haha.)
• NO DOGS ALLOWED
• large and beautiful lake
• playgrounds
• has restrooms
3. Train park (Central Park)
(40.683702, 141.370212)
Lots of blooms, small park but pretty heavy cherry blossom coverage
This is a very small parking lot, and make sure that you do not park in the Library parking lot on the other side of the building. They are pretty clearly marked.
This one is a family favorite of ours- it has a huge stationary train that our toddler LOVES to walk through. Lots of playground equipment- but it does get relatively busy because it is such a small park, and it is right in the middle of town. The blossoms are gorgeous here, though! Great 5-10 min walk, or like a 1 minute drive from base.
• stroller friendly on the outside perimeter, but this one is so small you probably won’t need to bring strollers
• playground
• walk-through train
4. Tateno Park
Main parking lot by scenic area- (40.6155691, 141.3323448)
Dirt lot by the playground side of the park- (40.611648, 141.330215)
TONS of blooms here, and lots of different kinds of cherry blossoms. Do be aware that some trees bloom at different times, though- so all trees may not be in bloom at the same time
I personally park in the dirt lot by the lake (it is located directly next to a huge and beautiful shrine tucked into some pines. I am not 100% sure this is parking for the park, but it was closest to the park that I wanted to explore, and was not full- so I considered it safe to park there.)
• stroller friendly for the most part, some paths are not paved, but are smooth enough to navigate a stroller over
• playgrounds/play equipment, swings
• NO DOGS ALLOWED
• large and beautiful lake
• tons of picnic areas/ grills available
• fishing friendly
• has restrooms
I could be wrong about this park NOT being dog friendly, but I am almost certain I saw signs posted saying pets were not allowed. I will update if I find this to be incorrect.

I have only visited this park once, and have not gone to the half that is not right around the lake.
It was BEAUTIFUL when we visited, and would be perfect for a picnic. There are several tables, lots of places to sit down for a snack, and LOTS of places for kids to run. The place is absolutely huge, and if you have loud and crazy kids- I would say this or Train Park would be your best bet.
This park has 2-3 different areas to it, and it is the PERFECT spot for a picnic.
5. Komaki (Komakionsen Shibusawa Park / Hoshino Resort )
Train station side parking: (40.667054, 141.353918)
Hotel side parking: (40.663124, 141.354045)
(I usually park at the hotel, then walk down to the other area near the train station.)
Less cherry blossoms, but enough to make it worth visiting- beautiful during literally any season/any month
• completely stroller friendly
• dog friendly
• foot onsen
• big red Japanese style bridge
• lots of Japanese style buildings & shrines
• large and beautiful lake


Komaki is a little less kid-friendly in the fact that it is usually VERY quiet, and there aren’t open spaces for kids to run. When festivals are going on here, I would say it is much less quiet, though.
Komaki area has two small parks- one right by the train station, and one by the hotel and onsen. (The onsen is no longer open to non-hotel guests.)
The train station side of the park has a lot more open space, but is much smaller- if that makes sense- and generally has less people occupying it. There are also FAR less cherry blossoms on this side- if any. (I will update this with certainty when I return after full bloom in Misawa.)
Hotel side-
When you park in the parking lot that the pin takes you to, it is REALLY confusing the first time that you try to find the scenic area. You will park in the lot, and see a bunch of hotels & buildings. (If you pull up Google Maps, you will see a lake. If you simply navigate yourself to the lake, you will find the loop easily.)
If you don’t have Maps readily available, walk into the building area. You will take a right before the main building, and will walk past a couple parking lots on your right. Once you go under the arch, you have found the scenic loop, and the foot onsen is directly to your right, overlooking the lake.
Our kids love this park because they are pretty quiet and calm kiddos, and like to just take stroller walks. If you have children that are excessively rambunctious or like to run, I actually don’t recommend walking the loop with them, simply because Komaki isn’t a park, just a gorgeous paved loop around the hotel. The hotel is just kind enough to allow non-hotel guests in.
That being said, there are miniature ponies and horses that are very friendly, and the entire place is gorgeous and interesting for kids- just maybe not the best for toddlers or kiddos that can’t be relatively calm while outside.
The foot onsen is open to the public, but please be respectful and quiet when using it.
I would consider Komaki more of a scenic walk/ cultural experience vs. a park. Cherry blossoms are supposed to be gorgeous here when in full bloom, though.


I hope these recommendations help you some! Even if you don’t visit during cherry blossom season, these parks are our absolute favorites to spend time at in Misawa, and are the best to get your family outside of the gate for a day. Hope you enjoy them as much as we have!

 Drew also loves the skiing on this mountain, but says he doesn’t recommend it for beginners, as there are tons of sulfur pits hidden in the mountain. (Had I known that I would have totally worried about him more while skiing- haha.)


 Henry LOVES rolling the cookies in the powdered sugar. He does a really good job at age two, and even places them on the cookie sheet himself.


